Managing Certificates
Goal: Enable students who pass a course to receive a certificate. Their grade will be verified, and if they have passed then they will receive a digital certificate which can be printed. Optionally, you can display hours of effort on the certificate.
Note that in Nutmeg, certificates no longer need to be requested by the student. They are automatically generated and available from the course dashboard if the instructions below are followed.
Pre-verify your course
Access your course in Studio
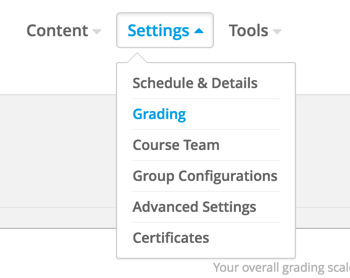
Go to Settings > Grading
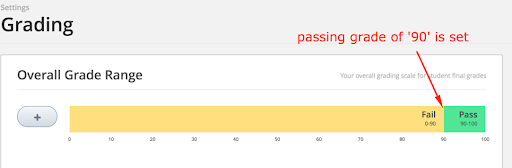
Verify that your passing Grade is accurate.
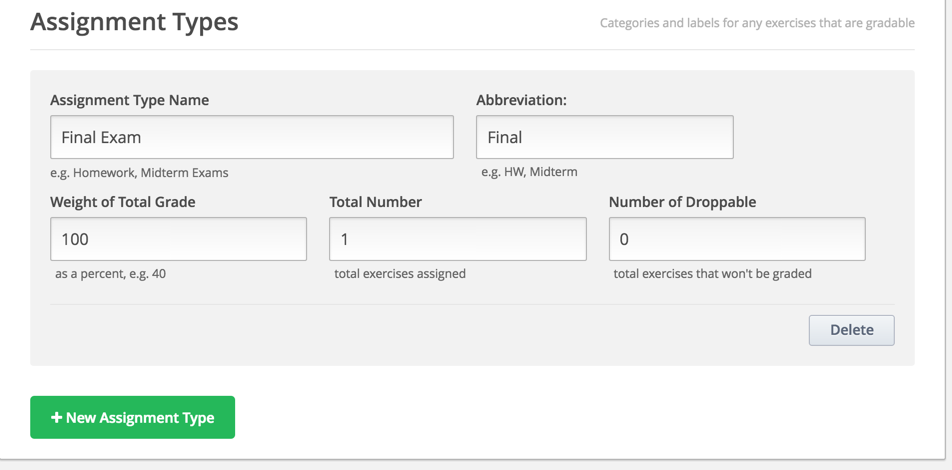
Verify that your grading Assignment Types are accurate. For example, if you have one final exam, then your setup will look something like this.
Verify that you have graded items in your Course Outline that match your Assignment Types.
- Go to Course Outline.
- On a subsection, click the gear icon

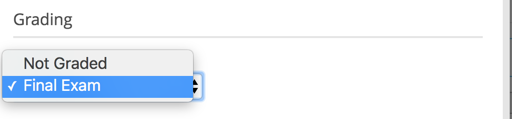
- Click the ‘Grade As’ Dropdown and choose your Assignment Type.
Set up your certificates
Click on Settings > Certificates.
Click the button to set up your certificate:

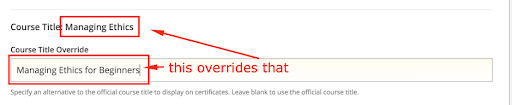
Optionally, you can override the course title:
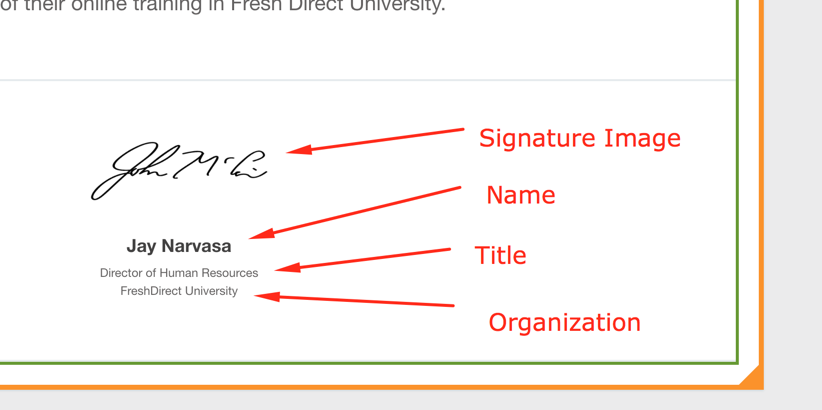
Add one or more signees.
Activate Your Certificates in CMS (Studio)
Certificate mode will always be ‘honor’.
Click ‘Activate’. Your certificate will now be active.


Allow your students to view certificate information before the course ends
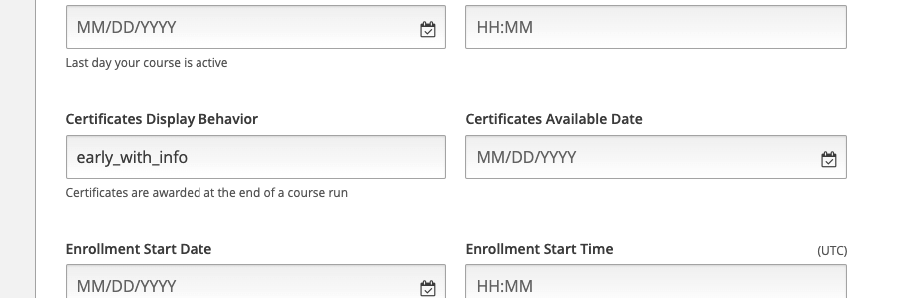
From the course in studio, click on Settings > Schedule & Details
Set 'Certificates Display Behavior' to "early_with_info" and save. You do not need to enter a 'Certificates Available Date'
Pass the course, and confirm that you can see a View Certificate button on the Progress Dashboard.

(Optional) Add Hours of Effort to your Certificate (LMS)
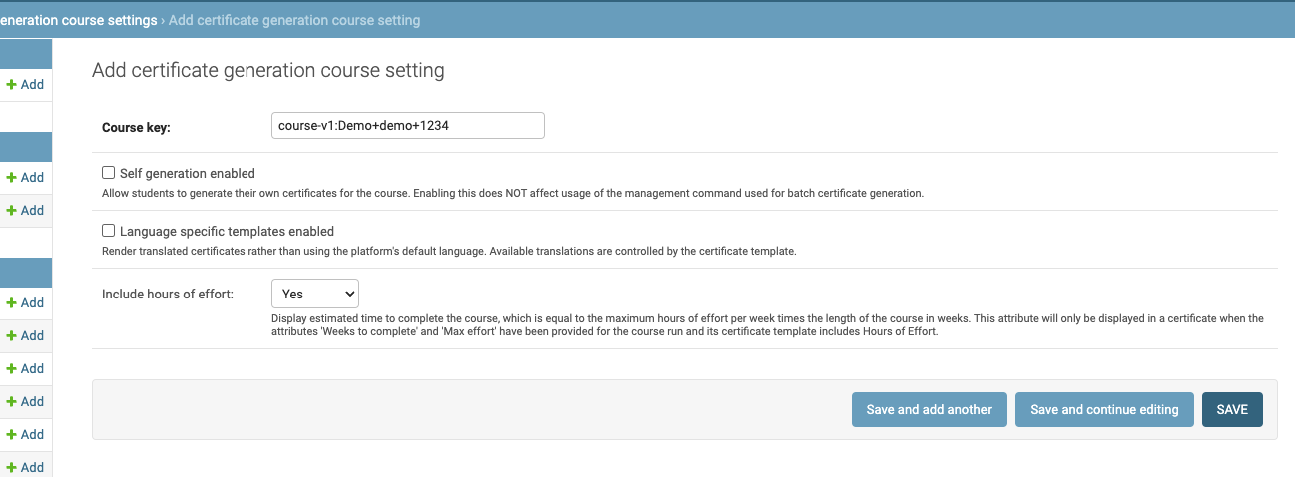
- From the LMS, navigate to the admin dashboard (/admin)
- Go to Certificates > Certificate generation course settings
- Click the button to '+ Add Certificate Generation Course Setting'
- Enter your course key (e.g. course-v1:Demo+demo+1234) in the 'Course Key' field.
- Change 'Include hours of effort' to 'Yes' and save
(Optional) Add Hours of Effort to your Certificate (Discovery)
Navigate to the Admin Panel for the Discovery Service (often found at discovery.your-domain.com/admin). For NDI, this is (discovery.ndi.org/admin)
Log into discovery admin panel with the special discovery superuser
- username: discovery_admin
- password: [contact servicedesk@ndi.org for password]
Note: the password is recorded in a shared LastPass folder that Tech Services and DemTech manage.
From the Admin Panel for the Discovery Service, navigate to Course Metadata > Course Runs
Find your course run and click on it to edit it.
Fill out the following fields on the Course Runs Form
- Max effort = The hours per week for your certificate (e.g. 4)
- Weeks to Complete = The number of weeks that your course rung (e.g. 6)
Note: The hours displayed on your certificate will equal 'Max Effort x Weeks to Complete' (e.g. 4 x 6 = 24)
Save your form.
Navigate back to the admin panel and find Course Metadata > Courses
Find your course (the parent of your courserun) and click on it to edit it.
Ensure that the partner field has 'Open edX' selected.
Save the form.